Image processing using OpenCV and Numpy in Python
OpenCV provides many functions to process or draw image in python.
Some of the drawing functions are:
cv2.line(): used to draw line on an image
cv2.rectangle(): used to draw rectangle
cv2.cv2.circle(): used to draw circle
cv2.putText(): used to write text
Task1: Create image by yourself in python
Here, I have created circles in python using the following code-
import numpy as np
import cv2
shreya_img = np.zeros((2000,1500,3), dtype=”uint8")
for i in range(0,1000):
radius = np.random.randint(0,high=50)
color = np.random.randint(0, high=1000, size=(3,)).tolist()
pt = np.random.randint(0,high=5000, size=(2,))
cv2.circle(shreya_img, tuple(pt), radius , color ,-1)cv2.imshow(“Created by Shreya” ,shreya_img)
cv2.waitKey()
cv2.destroyAllWindows()
The output with the title of the window as described in the code is-

Task 2
- Take 2 image crop some part of both image and swap it.
Here first we download two images that we want to work on.
I have taken 2 images named “Robot.jpeg” and “Human.jpeg”
First we import OpenCV and numpy.
import cv2
import numpy as np
Next we resize both the images in variable Rob and Hum and then read and show “Robot.jpeg” into python using functions of the cv2 module.
Rob = cv2.resize(cv2.imread(“Robot.jpeg”),(1200,800))
Hum = cv2.resize(cv2.imread(“Human.jpeg”),(1200,800))
cv2.imshow(“Robot”,Rob)
cv2.waitKey()
cv2.destroyAllWindows()
The output after we run this comes-

Now we crop this image to the part we would like to use further by defining the coordinates of the image we would like to use and hence storing it into another variable .
crop_Rob = Rob[25:450,420:950]
cv2.imshow(“Cropped Robot”,crop_Rob)
cv2.waitKey()
cv2.destroyAllWindows()
Following this, the cropped part of the image comes-

Doing the same with other image, first we show the real image in Python and then the cropped image that we want to work on-
cv2.imshow(“Human”,Hum)
cv2.waitKey()
cv2.destroyAllWindows()

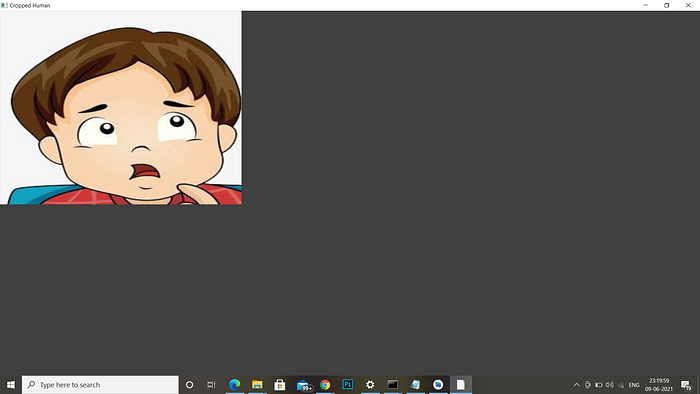
crop_Hum = Hum[10:435,300:830] #storing a cropped portion in crop_Hum
cv2.imshow(“Cropped Human”,crop_Hum)
cv2.waitKey()
cv2.destroyAllWindows()
Now we resize the crop_Hum image and then swap both the cropped part of “Human.jpeg” and “Robot.jpeg”
Means that the data which is stored in variable crop_Rob fills the data which is present in the defined coordinates in the Hum image above.
Same goes with other image.
crop_Hum = cv2.resize(crop_Hum,(530,425))
Hum[10:435,300:830] = crop_Rob
Rob[25:450,420:950] = crop_Hum
Now, we have successfully swapped both cropped parts into real images and when we run code to show the image, our output comes-
cv2.imshow(“Robot”,Rob)
cv2.waitKey()
cv2.destroyAllWindows()

Similarly on the other image-
cv2.imshow(“Human”,Hum)
cv2.waitKey()
cv2.destroyAllWindows()

Task 3
- Take 2 image and combine it to form single image. For example collage
Here, we will first import cv2 and numpy and then we are taking 5 images and resizing it first into equal lengths and storing it into respective variables for making a collage.
ujjwal = cv2.resize(cv2.imread(“ujjwal.jpeg”),(250,250))
#ujjwal = cv2.resize(ujjwal,(320,320))
shreya = cv2.resize(cv2.imread(“shreya.jpeg”),(250,250))
#shreya = cv2.resize(shreya,(320,320))
Shivam = cv2.resize(cv2.imread(“Shivam.jpeg”),(250,250))
#Shivam = cv2.resize(Shivam,(320,320))
Kunnu = cv2.resize(cv2.imread(“Kunnu.jpeg”),(250,250))
#Kunnu = cv2.resize(Kunnu,(320,320))
Raj = cv2.resize(cv2.imread(“Raj.jpeg”),(250,250))
#Raj = cv2.resize(Raj,(320,320))
After resizing we have shown all of the resized images using the code-
cv2.imshow(“shreya”,shreya)
cv2.waitKey()
cv2.destroyAllWindows()
for all the respective images and the hence the output for each of the image is like this-

Now to form a collage we use the function concatenate()
Raj_Kunnu = np.concatenate((Raj, Kunnu), axis=1)
shivam_ujjwal = np.concatenate((Shivam, ujjwal), axis=0)friends = np.concatenate((ujjwal, shreya , Kunnu, Raj, Shivam), axis=1)
cv2.imshow(‘Raj and Kunnu’, Raj_Kunnu)
cv2.imshow(‘shivam and ujjwal’, shivam_ujjwal)
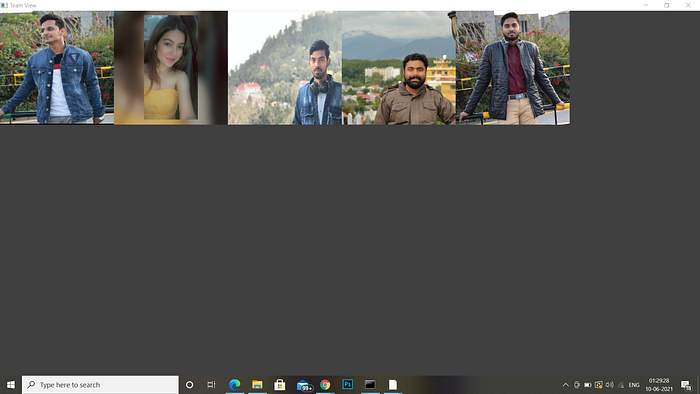
cv2.imshow(‘Team View ‘, friends)
cv2.waitKey(0)
cv2.destroyAllWindows()
With this, collage is formed for 2 images as well as a collage of 5 images. Following is the output that we get -


Thankyou for reading!
